Tutorial for Scheduling Group Appointments
On this page:Overview
This information will help you schedule your appointments online. It is important to read carefully all of the instructions to avoid any problems.
Remember:
- Your group has a limited time to schedule its appointments. Check the expiration date on the notification you received by electronic mail. In case your request expires, you will have to follow the same steps again to solicit a new one.
- The group coordinator schedules the group’s appointments, but the applicant must complete his or her own Form DS-160.
- Our agents cannot schedule group appointments, but they can help you with questions. At the bottom of the page are telephone number and email address of our call center for further help.
How to Apply
Step 1
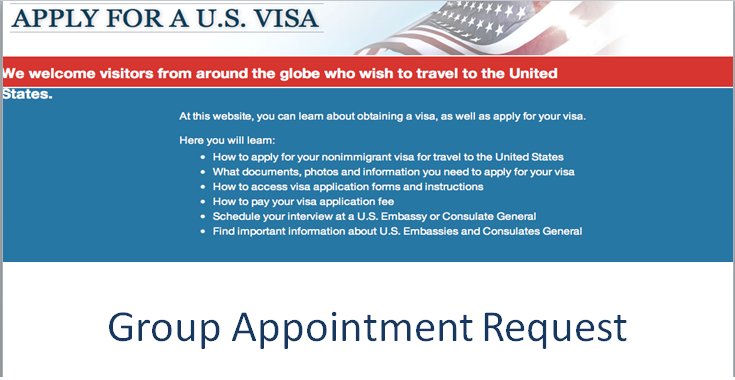
Logon to http://www.ustraveldocs.com and select the country you are applying from
Please be sure to have the following information for each group member available:
- Applicant’s passport
- Receipt number corresponding to the visa application fee
- The 10-digit DS-160 confirmation number.
Step 2

Click on “Apply Now” to create a username and password which will allow you to create a profile.
Step 3
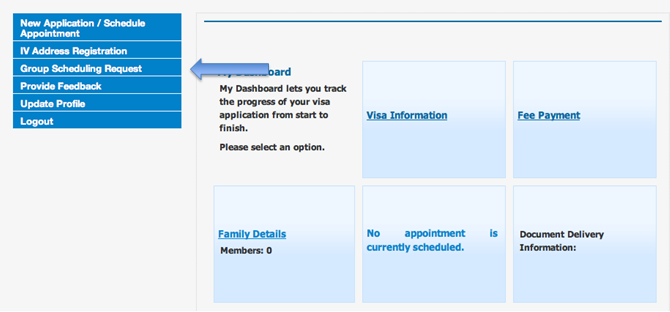
Select “Group Scheduling Request” from the menu.
Step 4
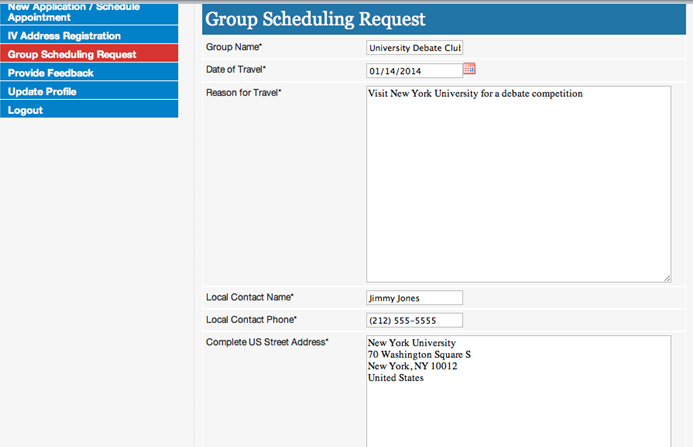
Insert all required information and submit.
Step 5

You will receive this confirmation that your group request was submitted to the U.S. Embassy.
Please wait for an email response from the Embassy informing you if your request was approved or denied.
Step 6
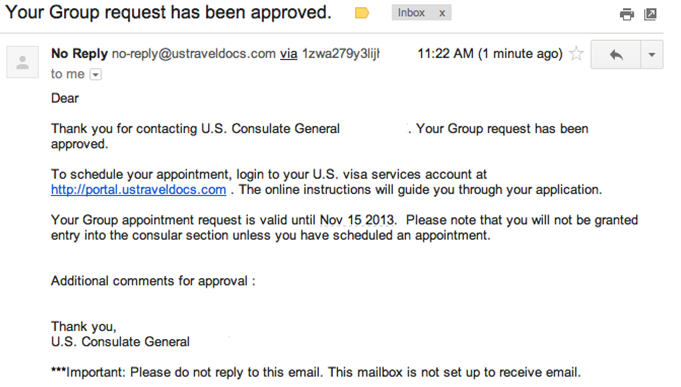
Once your group request has been approved by the U.S. Embassy you will receive an email similar to this.
Please log in to your account to continue scheduling.
Step 7
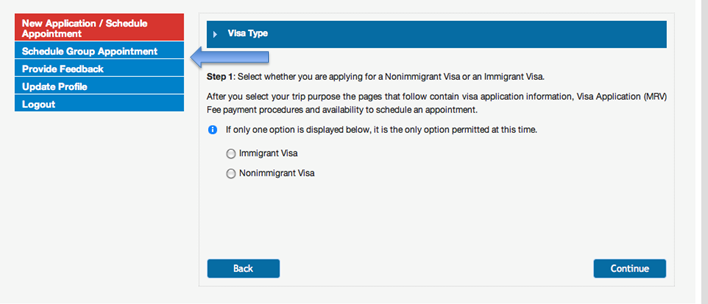
Click on “Schedule Group Appointment”.
Step 8

Select your group
Step 9
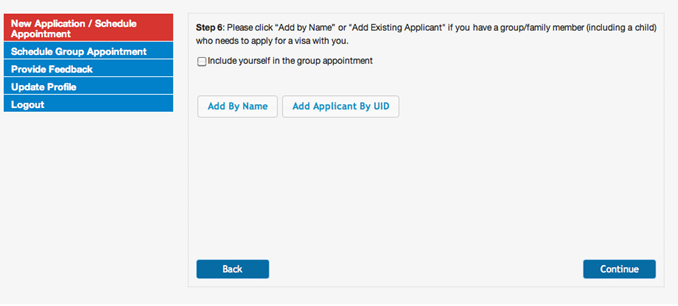
Check the Include “Yourself in the Group Appointment” box if you will be traveling with the group.
Click on “Add By Name” to begin adding the information of each person in your group.
Step 10
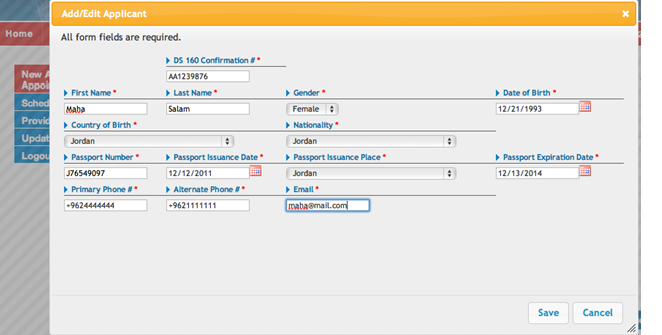
Fill in all the required information for each person in your group.
Step 11
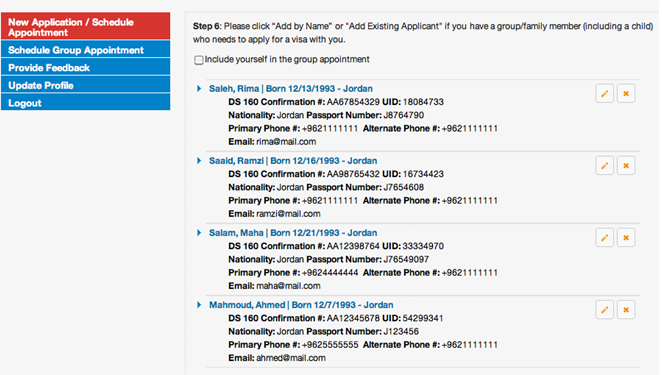
Continue adding names until all members of the group are listed.
When all members of the group are listed choose continue.
Step 12
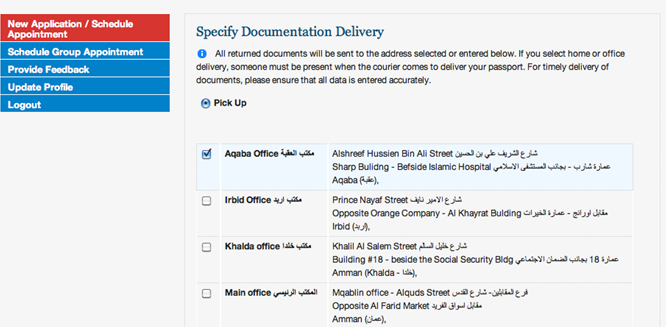
Choose your passport pickup location (if applicable).
Step 13

Print your deposit slip and make payment as directed on the deposit slip.
Step 14
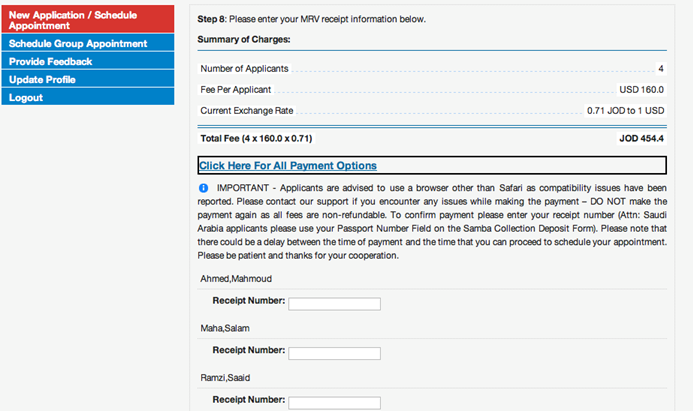
Enter a receipt number for each member of the group.
The same receipt number may used for all members of the group if one payment was made for the entire group (recommended).
Step 15
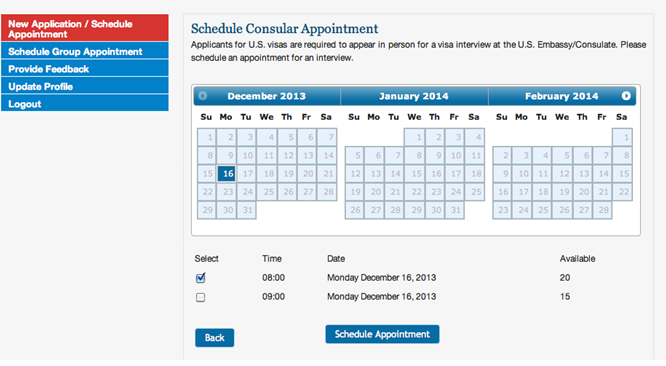
Select your appointment time.
Step 16
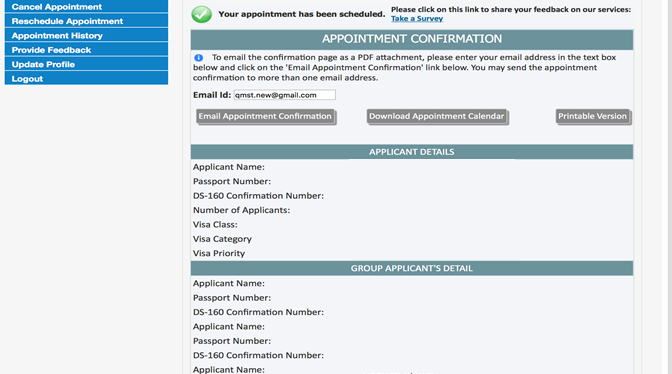
Once your appointment has been confirmed you must print your appointment confirmation letter which is required to enter the Embassy/Consulate by doing the following:
- Email it to yourself or someone else for it to be printed.
- Download and save it onto your computer for future reference.
- Make sure this appointment confirmation is printed and with you for your appointment at the Embassy or Consulate.